How to Add and Manage Categories and Tags for Your WordPress Posts

Introduction
Categories and tags are essential tools in organizing and managing your WordPress posts effectively. By properly categorizing and tagging your content, you make it easier for visitors to navigate your website and find relevant information. In this article, we will guide you through the process of adding and managing categories and tags for your WordPress posts, helping you optimize your content organization.
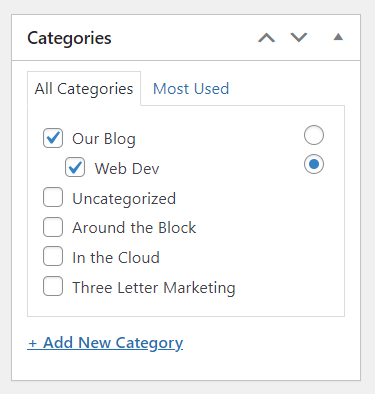
Categories provide a hierarchical structure for organizing your content. They help create broad sections on your website, allowing visitors to browse through specific topics or themes. Follow these steps to add and manage categories:
1. Access the WordPress Dashboard: Log in to your WordPress website and navigate to the Dashboard.
2. Locate the Categories Section: In the left-hand menu, click on “Posts” and then select “Categories.”
3. Add a New Category: On the Categories page, enter the name, slug (URL-friendly version), and optional description for your category. If you wish to create a parent-child relationship between categories, you can specify the parent category. Click on the “Add New Category” button to save it.
4. Edit or Delete Categories: To modify an existing category, hover over it and click on the “Edit” button. Here, you can update the category name, slug, description, or parent category. If you no longer need a category, you can delete it by selecting the “Delete” option.
Utilizing Tags
Tags provide a more granular way of organizing your content by highlighting specific keywords or topics related to your posts. Here’s how to add and manage tags in WordPress:
1. Access the Post Editor: Open the WordPress editor for the post you want to add tags to or create a new post.
2. Locate the Tags Section: In the right-hand sidebar of the editor, you will find a box labeled “Tags.”
3. Add Tags to Your Post: Enter relevant keywords or phrases separated by commas in the “Tags” box. You can add multiple tags to a single post.
4. Create New Tags: If the tag you want to use does not exist yet, enter it in the “Tags” box, and WordPress will create it as a new tag.
5. Manage Existing Tags: To view and manage all your tags, navigate to the WordPress Dashboard and click on “Posts,” then “Tags.” Here, you can edit or delete tags as needed.
To make the most of categories and tags, consider the following best practices:
1. Use Descriptive and Relevant Labels: Choose category and tag names that accurately reflect the content of your posts. This will help users find information quickly and improve SEO.
2. Limit the Number of Categories: Avoid creating too many categories, as this can make your website overwhelming and difficult to navigate. Aim for a reasonable number of broad categories.
3. Be Consistent: Maintain a consistent naming convention for your categories and tags throughout your website. This consistency will ensure that users can easily understand and browse your content.
4. Review and Update Regularly: Periodically review your categories and tags to ensure they remain relevant. Remove any outdated or unused options and create new ones if needed.
Conclusion
Properly organizing your WordPress posts using categories and tags is vital for a well-structured website and improved user experience. By following the steps outlined in this article, you can easily add and manage categories and tags, optimizing your content organization and making it easier for visitors to find the information they are looking for. Remember to review and update your categories and tags periodically to keep them up to date and relevant to your content.
